WELCOME!
My name is Jason Hensley. I teach students how to build great games for a living.
This website shows a few of my courses. Contact me to get access to the entire library, or hire my one-on-one gamedev services for your next game project. I am proficient with all the top game engines: Unreal, Unity, Gamestudio, etc.
COURSE SAMPLES
C# Scripting for Unity
Course outline:
- Lesson 1: Creating your first C# script
- Lesson 2: Variable types and their attributes
- Lesson 3: Managing player input
- Lesson 4: The basics of physics
- Lesson 5: Handling collision
- Lesson 6: Working with arrays
- Lesson 7: Lists from A to Z
- Lesson 8: Audio scripting
- Lesson 9: Using lights
- Lesson 10: Materials
- Lesson 11: Animation
- Lesson 12: Building your games
Lesson1: Creating your first C# script
Welcome! This course will teach you how to create custom controls and elements for Unity using C#, and how to add use them with your game objects. While Unity supports several programming languages (three at the moment) C# is by far the best of them. Not only that, but if you learn to program using C#, you will be able to use it in other integrated development environments, such as Microsoft's Visual Studio. It's a win-win situation!
The first lesson will teach you how to code and attach a C# script to an object. We will create a simple cube, and then attach it a code snippet that allows us to rotate it and move it in any direction.
Before we begin, it is important to understand that when it comes to building games, Unity doesn't have too many drag-and-drop components. If you want to create a unique game and customize it to your liking, you will have to play with code.
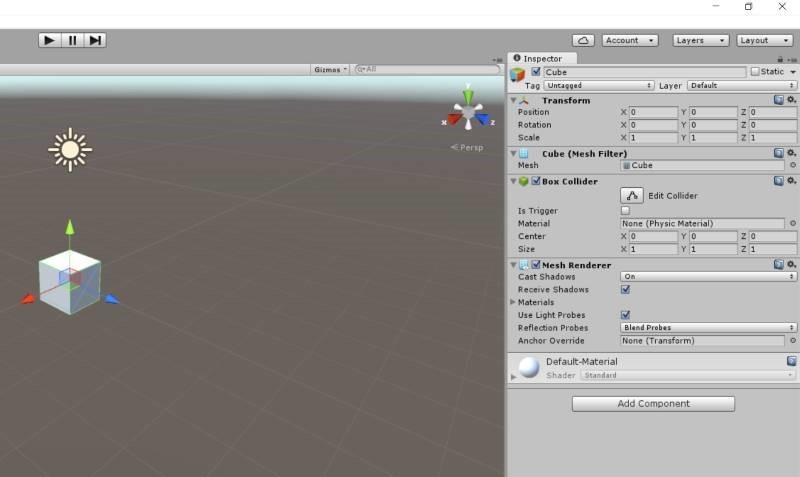
Start a new project, and then choose "GameObject" -> "3D Object" -> "Cube" from the top menu. A cube will be added to the scene, just like in the image below.
Each object in Unity needs to be controlled by a script, which is attached to the object, becoming a component of that object.
Select the cube to bring on its "Inspector" section.
You will notice that the object has several sets of properties:
- "Transform" sets the position, angles and scale of the object.
- "Mesh filter" stores the mesh-related information for our object: its type, number of vertices, triangles, etc.
- "Box collider" sets the physics properties of the object. We will discuss physics later on in the course.
- "Mesh renderer" sets the properties of the materials that will be used for our object.
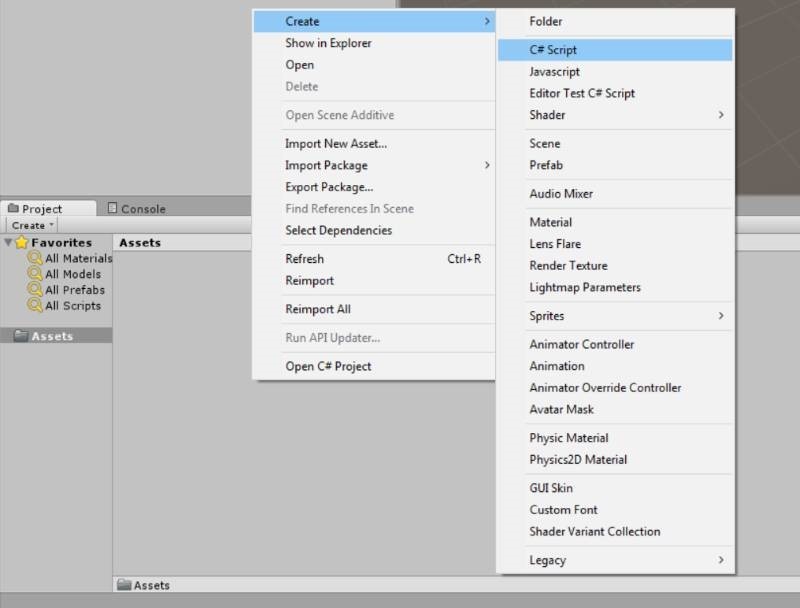
It's time to add a script to our object now! Right click the "Assets" area at the bottom of the screen, and then choose "Create" -> "C# Script". Take a look at the picture below to see how it's done.
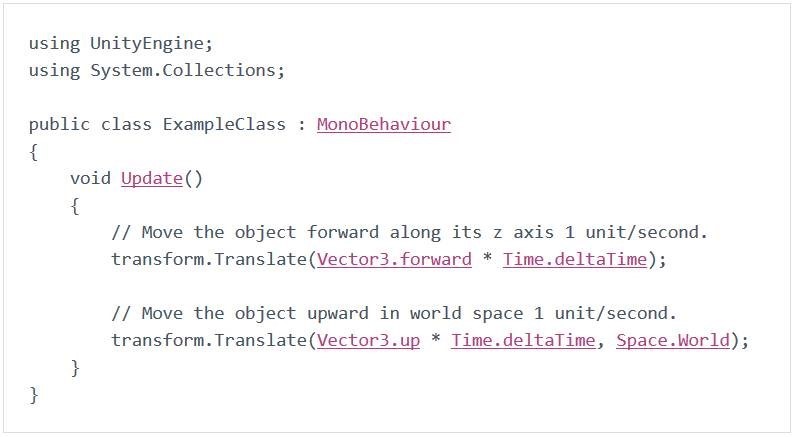
Copy/paste the code below in your C# script.
using UnityEngine;
using System.Collections;
public class TransformFunctions : MonoBehaviour
{
public float moveSpeed = 10f;
public float turnSpeed = 50f;
void Update ()
{
if(Input.GetKey(KeyCode.UpArrow))
transform.Translate(Vector3.forward * moveSpeed * Time.deltaTime);
if(Input.GetKey(KeyCode.DownArrow))
transform.Translate(-Vector3.forward * moveSpeed * Time.deltaTime);
if(Input.GetKey(KeyCode.LeftArrow))
transform.Rotate(Vector3.up, -turnSpeed * Time.deltaTime);
if(Input.GetKey(KeyCode.RightArrow))
transform.Rotate(Vector3.up, turnSpeed * Time.deltaTime);
}
}
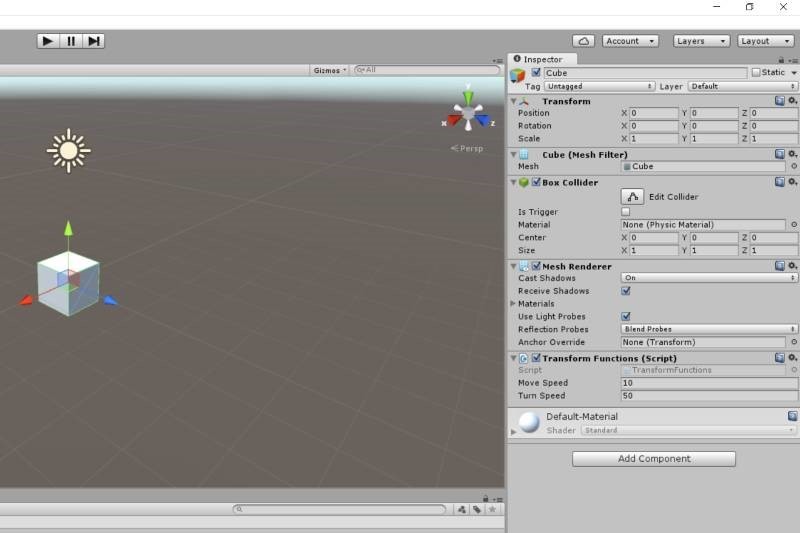
Make sure that the C# file name and the class name are identical, and then drag the script over the "Add Component" button on the right side of the screen. If everything works as expected, your script should now be added to the cube.
Aren't you curious to run the project? Press the "Play" arrow at the top of the screen, and then you will be able to move the cube around by pressing the Up and Down arrows and rotate it using the Left and Right arrows.
Congratulations! You've just created your first C# Unity script. We'll discuss what each line of code does in the following lesson.